Winter does not ruin garden tools in one dramatic moment. It does it slowly: wet soil left on a spade, sap dried into secateurs, a battery left in a freezing shed, a mower parked with damp grass packed underneath. Cleaning and storing garden tools for winter is mostly a one-hour job, but it saves replacing £25 secateurs, £45 loppers or a £120 cordless hedge trimmer because they were put away wet in November.
In This Article
- The Winter Tool Check That Saves the Most Money
- What to Clean Before You Put Tools Away
- How to Dry, Oil and Protect Metal Parts
- Wooden Handles, Plastic Grips and Moving Parts
- Battery, Petrol and Corded Tools Need Different Winter Storage
- Where to Store Garden Tools Through a UK Winter
- Frequently Asked Questions
The Winter Tool Check That Saves the Most Money
The best winter tool-care routine is not complicated. Bring the tools together, remove soil and sap, dry every metal part, oil anything that can rust, protect handles, remove batteries, and store everything off the floor. Do that before the shed gets properly cold and damp, and spring starts with tools that work rather than tools that need rescuing.
I would rather spend £12 on a wire brush, cloths and oil in autumn than buy replacement tools in March. A basic clean-up kit from Screwfix, B&Q or Toolstation costs roughly:
- Wire brush: about £3-£6 for dried soil and light rust.
- Stiff hand brush: about £4-£8 for spades, forks and trowels.
- General-purpose oil or camellia oil: about £5-£12 for blades and hinges.
- Boiled linseed oil for wooden handles: about £6-£10 for a small tin.
- Wall hooks or a basic rack: about £8-£25 depending on length and load rating.
That is cheaper than one decent pair of secateurs. It also stops you doing the classic spring job: standing in the shed with a rusty fork, pretending you meant to replace it anyway.
Do it before the first hard frost
Late October to December is the sensible window for most UK gardens. You do not need to wait until every leaf has dropped. If the main growing season is done and the tools are about to sit unused, clean them.
There are two exceptions. Keep a small set accessible for winter jobs such as pruning, clearing paths, and moving pots. Also leave snow shovels, stiff brooms and grit tools reachable if your garden steps or patio get icy. Winter storage should make spring easier, not bury the one tool you need after the first storm.
Start with a reject pile
Before cleaning, be blunt about broken tools. Bent cheap forks, cracked handles, missing guards, split extension leads and batteries that no longer hold charge should not go back on the wall. Repair the good ones. Recycle or dispose of the unsafe ones.
If you are just building a sensible kit, the guide to essential garden tools for beginners is a better shopping list than replacing every tool like-for-like. Plenty of sheds contain three bad trowels and no decent hand fork.
What to Clean Before You Put Tools Away
Clean anything that touched soil, sap, grass clippings, compost, diseased plants or wet timber. That includes hand tools, pruning tools, mower decks, hedge-trimmer blades, strimmer guards, wheelbarrow trays, kneeling pads and plant supports if you plan to store them.
The RHS says regular cleaning helps tools last longer and can help control the spread of plant diseases and viruses. Its cleaning hand tools advice is worth following particularly for secateurs, loppers, knives and tools used on diseased plants.
Soil tools: spades, forks, hoes and trowels
For soil tools, the job is mostly physical:
- Knock off loose soil. Use a stick or brush, not the shed wall.
- Scrub the metal head. A stiff brush removes most dried mud.
- Wash only when needed. If soil is baked on, use warm water and dry the tool fully afterwards.
- Check the socket and rivets. Mud often hides where the handle meets the head.
- Remove light rust. A wire brush or fine abrasive pad is enough for surface rust.
Do not over-polish working tools. A spade is allowed to look like it has been in a garden. The aim is clean, dry and protected, not showroom-perfect.
Cutting tools: secateurs, loppers and shears
Cutting tools need more care because sap and plant disease can sit on blades. Wipe off resin and green residue before it hardens. If the tool was used on diseased growth, clean and disinfect it before winter storage.
For secateurs, I use a cloth first, then a careful brush around the hinge and spring. If the blades are blunt, do not turn this article into a sharpening marathon. Clean them, oil them, and use the dedicated garden tool sharpening guide when you have ten quiet minutes and a stable bench.
Mowers and grass tools
Mowers, strimmers and shears often go into winter with wet grass stuck to them. That is rough on metal and plastic, and it can smell awful by spring.
Brush grass from mower decks, wheels and height-adjustment areas. Unplug mains tools first, remove batteries from cordless tools, and keep hands away from blades. For petrol mowers, follow the manufacturer instructions before tipping or cleaning around the deck. If you have a mower that already needs attention, the lawnmower maintenance guide covers the deeper jobs.
How to Dry, Oil and Protect Metal Parts
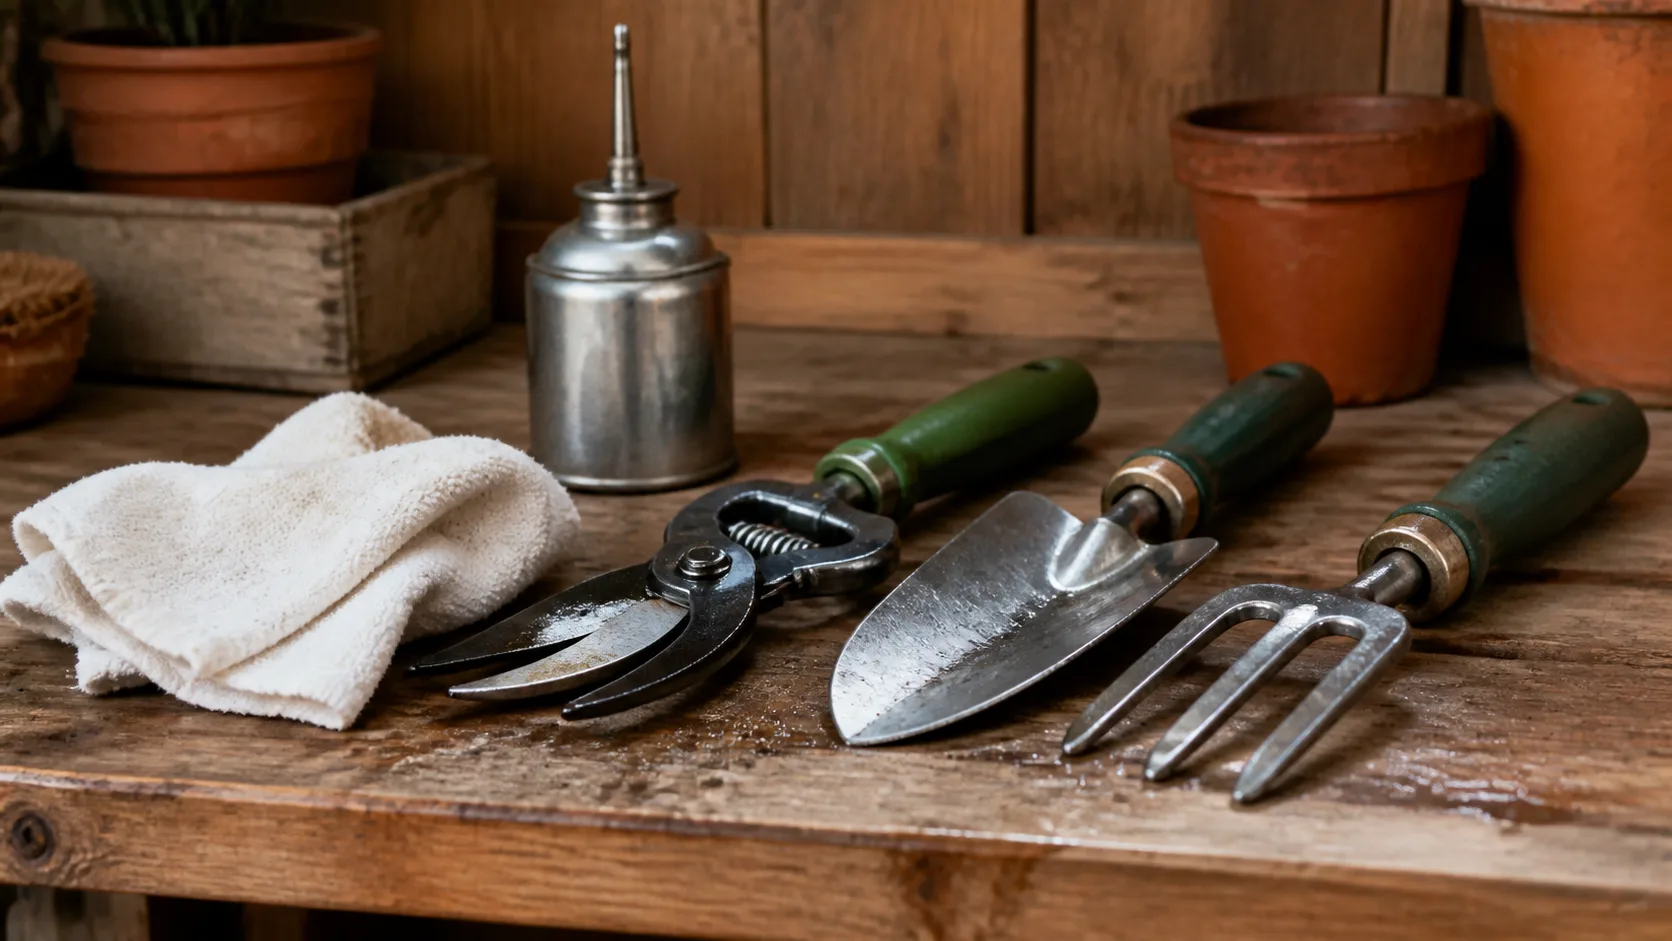
Drying is the bit people rush. Oil over damp metal and you trap moisture underneath. After washing, leave tools open in a dry place, wipe them with an old towel, and give hinges, blades and metal heads time to lose surface moisture before oiling.
For most home gardeners, you do not need fancy products. A small tin of camellia oil, 3-in-1 oil, light machine oil or a garden-tool oil from Amazon UK, Screwfix or B&Q will do. Expect about £5-£12. If you already have WD-40 Specialist or similar in the shed, it can help displace moisture, but I still prefer a light protective oil for blades and hinges.
What to oil
Oil thinly. Tools should not feel greasy when you hang them up. Focus on:
- Secateur blades: wipe both sides, then open and close the tool a few times.
- Lopper hinges: add a tiny drop to the pivot and wipe off excess.
- Spade and fork heads: use an oily rag across the metal after drying.
- Hedge shear blades: wipe the cutting faces and the pivot.
- Hoe and edging tool blades: protect the cutting edge and corners.
The mistake is leaving visible oil on handles, grips or floors. Thin film, not chip-shop shine.
What not to oil
Do not oil rubber grips, electrical connectors, battery contacts, belts, brake surfaces, or plastic housings unless the manufacturer says so. Oil attracts dust and can make grips slippery. It can also damage some plastics.
If a power tool blade needs lubrication, check its manual. Hedge trimmers often need blade oil. Cordless drills and garden multi-tools may not want random oil near vents or battery slots.
Rust that needs more than a wipe
Orange staining is usually manageable. Flaking rust, pitting on a blade, a split handle socket, or a cracked fork tine is different. Clean it and judge whether the tool is still safe. A £10 rusty spade from a car boot sale might be worth saving. A cracked digging fork that twists under load is not.
Wooden Handles, Plastic Grips and Moving Parts
Wooden handles fail when they are left wet, split at the grain, or loosen at the head. Plastic grips fail when they crack, harden, or trap water. Moving parts fail when sap and grit sit in the joint for months.
Run your hand along wooden handles carefully. Splinters are a sign the handle needs sanding or replacing. A sheet of 120-180 grit sandpaper costs about £3-£5 and is enough for most rough handles. Wipe the dust away, then apply a thin coat of boiled linseed oil if the handle looks dry. Do not soak it. Leave it to dry properly before hanging the tool.
Tighten before storage
Winter is a good time to fix wobble:
- Loose screws: tighten handle screws, blade screws and rack fixings.
- Missing nuts: replace them before the part vanishes into the shed floor.
- Weak springs: replace secateur springs if the tool no longer opens cleanly.
- Cracked handles: replace the handle or retire the tool.
Small spares are cheap. Secateur springs are often £3-£8. Replacement handles for spades and forks can be £10-£20, but check whether the tool is worth the repair. If the metal head is cheap and tired too, buying a better tool may make more sense.
Keep sharp edges protected
Blade covers are not just for safety. They stop oiled blades rubbing against other tools and losing the protection you just added. If you lost the cover, use a purpose-made guard, a small offcut of hose, or a wrapped piece of cardboard secured with string. Do not use tape directly on a freshly oiled blade; it leaves a sticky mess.
For mixed shed storage, the small-shed garden tool storage guide has layout ideas, but for winter the rule is simpler: sharp edges covered, metal dry, tools not leaning in a wet corner.
Battery, Petrol and Corded Tools Need Different Winter Storage
Hand tools forgive lazy storage better than powered tools. Batteries, chargers, petrol, cords and blades need a separate winter routine because cold, damp and old fuel cause different problems.
Cordless garden tools
Remove lithium-ion batteries from mowers, hedge trimmers, strimmers and blowers before winter storage. Store batteries indoors or somewhere dry and stable, not on a freezing shed floor. Many manufacturers recommend storing batteries partly charged rather than empty or fully drained, so check your manual.
I would not leave a £70-£130 spare battery in a damp shed just because the tool body lives there. A lidded plastic box indoors costs about £6-£15 from Really Useful Boxes, IKEA or Homebase and is a better home for batteries and chargers.
If you are deciding whether cordless tools are worth the money, the cordless garden tools guide covers power and battery trade-offs in more depth.
Petrol tools
Petrol mowers and other petrol garden tools need manufacturer-led storage. Old fuel can cause starting problems, and different engines have different advice. Some owners run equipment dry, some use fuel stabiliser, and some drain fuel before storage.
Dispose of old fuel and garden chemicals properly. GOV.UK’s hazardous waste disposal service finder is the safest starting point if you are unsure what your local council accepts. Do not pour old fuel, oil, herbicide or solvent down a drain.
Corded tools
Corded tools need dry storage and cable inspection. Wipe the body, clean guards and vents, check the cable for cuts or crushed sections, and coil it loosely. If the plug, strain relief or cable insulation looks damaged, stop using it until it is repaired or replaced.
The broader garden power tool safety guide is the better place for operating rules. This winter job is about storing tools so they are safe to pick up again in spring.
Where to Store Garden Tools Through a UK Winter
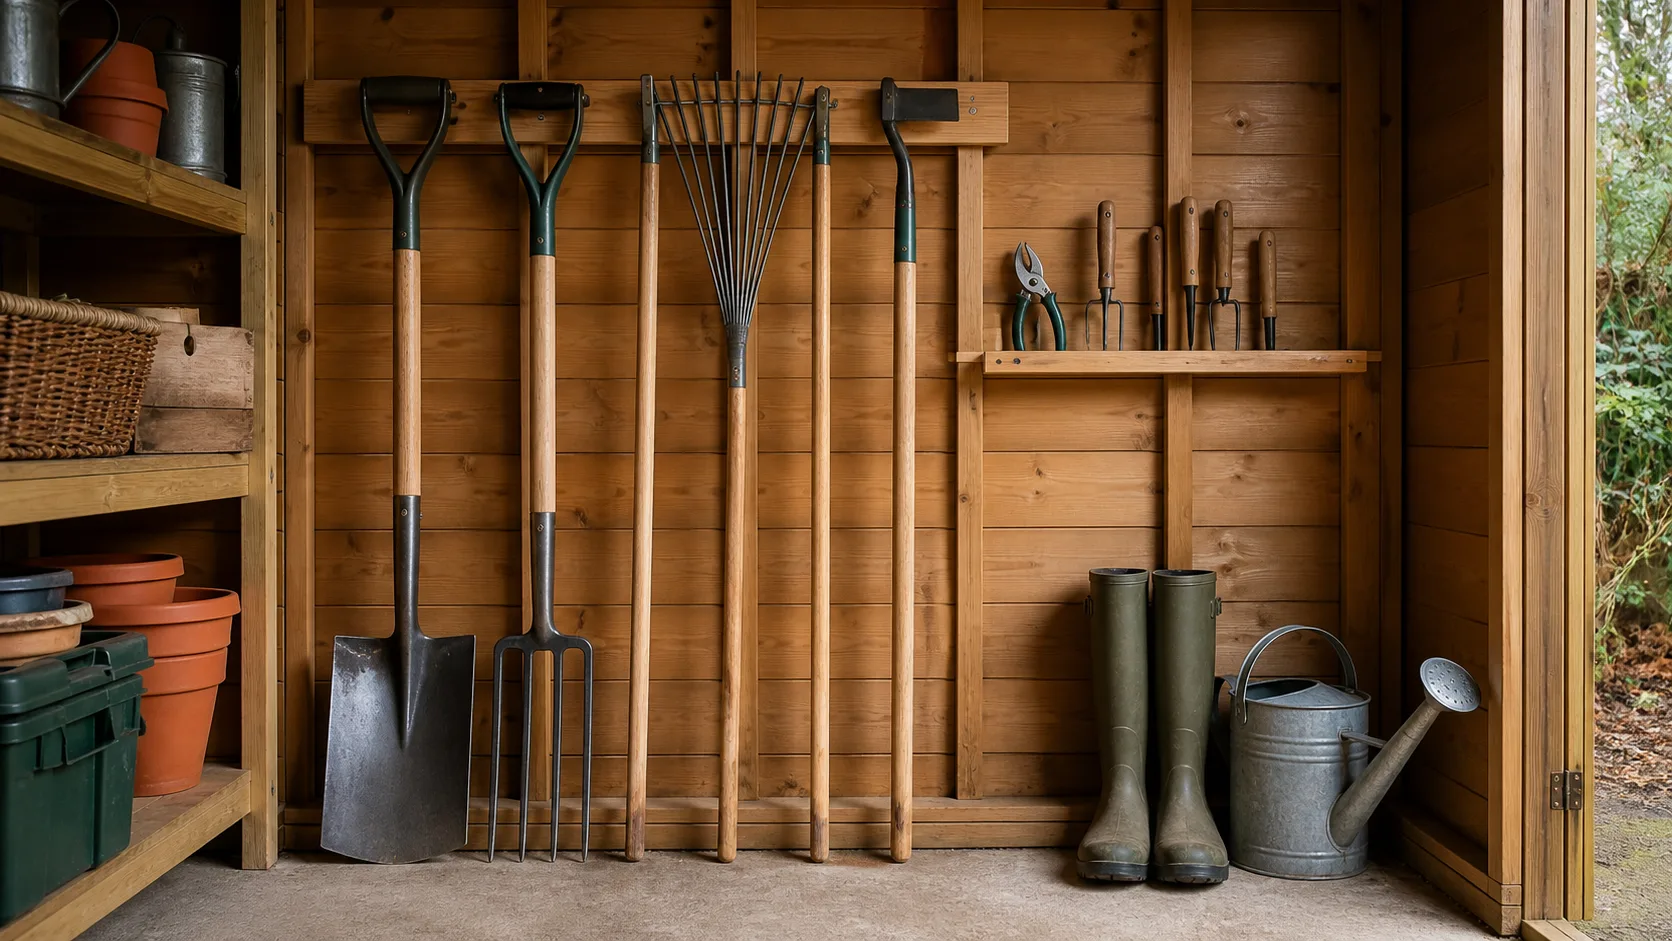
The best winter storage spot is dry, ventilated, off the floor and easy to inspect. A shed can work if it does not leak and the tools are not sitting against a damp wall. A garage can work if garden chemicals and fuel are handled safely. A utility room can work for batteries and chargers, but not muddy tools.
Do not store tools in a heap. Metal heads scrape each other, sharp edges get knocked, and handles sit in whatever water runs across the floor. Wall hooks, a simple rack or a raised shelf are better.
The best cheap storage setup
For most sheds, I would buy:
- Heavy-duty wall hooks: about £4-£12 for a pack from Screwfix, B&Q or Toolstation.
- A basic long-handled tool rack: about £12-£25 from Amazon UK, Homebase or B&Q.
- A shallow shelf for small tools: about £10-£20, or use an existing crate if it stays dry.
- A lidded indoor box for batteries: about £6-£15, kept away from radiators and damp.
If I had to choose one upgrade, I would get tools off the floor first. Floor contact is where winter damp does its quiet damage.
Where not to store tools
Avoid these places:
- Against an outside shed wall: especially if condensation forms there.
- Under a leaking roof edge: even occasional drips are enough to start rust.
- Inside sealed plastic bags: they can trap moisture around metal.
- Mixed with chemicals: spills and fumes are bad for tools and unsafe for people.
- On bare concrete floors: cold damp floors are unkind to metal and wooden handles.
After the first heavy rain, check the shed. If tools feel cold and wet to the touch, the storage spot is not dry enough. Move them before January makes the problem obvious.
Label only if it helps
You do not need a perfect pegboard wall with outlined silhouettes. You need a setup you will use. Put the tools used together near each other: pruning kit, digging kit, lawn kit, and power-tool accessories. Keep guards and chargers with the tool they belong to.
The final test is simple: can you find the secateurs, check the mower battery, and grab a spade in 30 seconds without moving six other things? If yes, the winter storage is doing its job.
Frequently Asked Questions
Should I wash garden tools before winter storage? Yes, if they have soil, sap, grass or plant residue on them. Wash only when needed, dry the metal fully, then oil blades, hinges and metal heads lightly before storage.
What oil should I use on garden tools? A light machine oil, camellia oil or garden-tool oil is fine for metal parts. Expect to pay about £5-£12 in the UK. Boiled linseed oil is better suited to dry wooden handles.
Can I leave cordless tool batteries in the shed over winter? It is better to remove batteries and store them indoors or in a dry, stable place. Cold and damp can shorten battery life, and replacement garden-tool batteries often cost £70-£130.
Do I need to sharpen every garden tool before winter? No. Clean and protect everything first. Sharpen tools that need a usable edge, such as secateurs, shears, hoes and spades, but do not grind away metal just because it is winter.
How do I stop garden tools rusting in a shed? Store tools clean, dry and off the floor. Add a thin oil film to metal parts, avoid damp walls, and check the shed after heavy rain to make sure the storage area stays dry.
Is it worth buying a garden tool rack? Yes, if tools currently lean in a damp pile. A basic rack or heavy-duty hooks cost about £8-£25 and usually protect tools better than another plastic storage box.