Sharp garden tools make ordinary jobs easier: secateurs cut cleanly, hoes skim through weed seedlings, spades slice into turf, and mower blades leave a neater lawn. Blunt tools crush stems and tear grass, which is harder on plants and harder on your hands. Learning how to sharpen garden tools at home is mostly about cleaning the tool, following the existing bevel, and stopping before you remove too much metal.
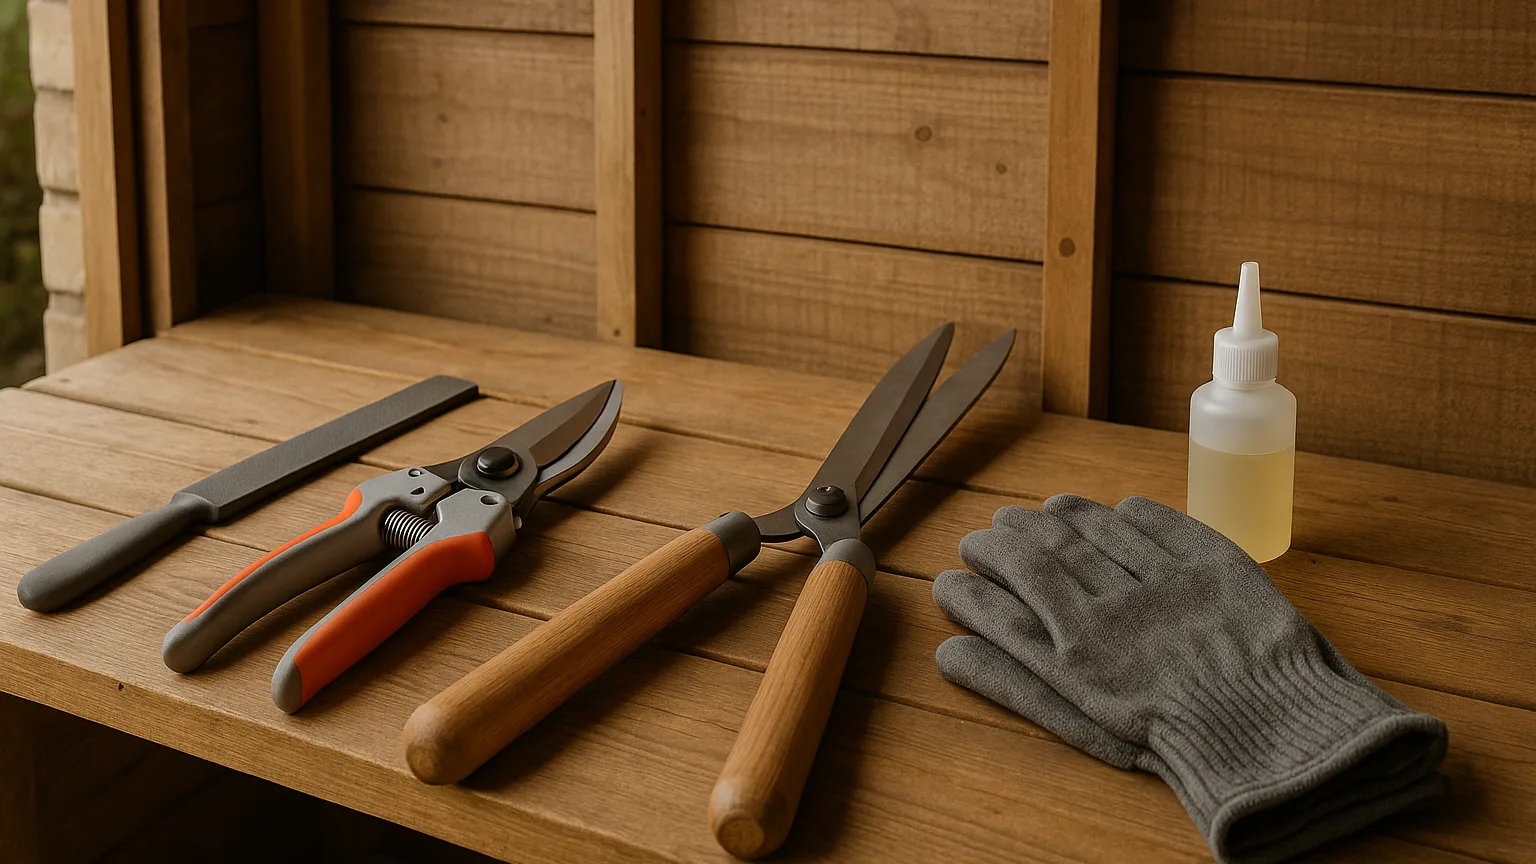
You do not need a workshop full of kit. A decent file, a diamond sharpener, a stiff brush, oil, a vice or clamp, and sensible protective gear will cover most shed jobs. The aim is a strong working edge, not a razor. Garden tools meet soil, grit, stems and the odd hidden stone, so an over-fine edge will not last.
The guidance below covers secateurs, loppers, shears, hoes, spades and mower blades, with notes on tools that are better left alone or sent for servicing. If a tool is cracked, badly bent, loose in the handle or missing safety parts, sharpening is not the answer. Fix the fault first, or retire it.
In This Article
- Before you start: clean, inspect and make it safe
- The sharpening kit that earns its place in a shed
- Understand the bevel before you sharpen
- How to sharpen secateurs and loppers
- Sharpening garden shears and hedge tools
- How to sharpen hoes, spades and edging tools
- Sharpening a lawn mower blade at home
- Pruning saws, serrations and tools best left alone
- Finishing, oiling and storing sharp tools
- Common sharpening mistakes to avoid
- Frequently Asked Questions
Before you start: clean, inspect and make it safe
Sharpening dirty tools is frustrating and can damage the file. Brush off soil, scrape away compacted mud, then wash the metal parts and dry them properly. Sticky sap on secateurs and shears usually comes off with warm soapy water, methylated spirits on a rag, or a dedicated resin remover. Do not soak wooden handles for long; wipe them instead.
Inspect the tool in good light. Look for cracks around the socket of a spade, chips in cutting blades, loose pivots, split handles and missing nuts. A small nick in a blade can often be filed out. A deep crack, a badly twisted mower blade or a broken locking catch on secateurs needs repair or replacement before the tool is used again.
Take safety seriously, especially with powered equipment. Wear eye protection when filing or grinding, and use gloves that still let you grip the tool securely. Clamp the item rather than holding it in your lap. For cordless tools, remove the battery. For corded tools, unplug them. For petrol mowers, disconnect the spark plug lead before touching the blade. The HSE’s maintenance advice for work equipment is aimed at workplaces, but the principles are useful at home too: isolate the equipment, prevent accidental starting, and use the right tools for the job.
The sharpening kit that earns its place in a shed
For most UK gardeners, a simple kit is enough. A diamond file or pocket diamond sharpener is ideal for secateurs, loppers and shears because it cuts quickly and copes well with hardened steel. A 200–250 mm second-cut mill file is useful for hoes, spades and mower blades. A small round file may help on serrations, although many pruning saws are not worth sharpening at home.
- Stiff wire brush or nylon brush for soil and rust.
- Diamond sharpener for bypass blades and tight curves.
- Flat mill file with a handle fitted; never use a bare tang in your palm.
- Vice, clamp or sturdy workbench to hold the tool still.
- Light machine oil, camellia oil or a similar rust-preventing oil for wiping metal after sharpening.
- A spanner or socket set for mower blades and some loppers.
- Eye protection, close-fitting gloves and a dust mask if you are creating dust or using a grinder.
A bench grinder or angle grinder can remove metal very quickly, which is both the benefit and the danger. Heat can draw the temper from a blade, leaving the edge soft and short-lived. If you use a grinder, use light touches, keep the blade moving, and cool it often. Many home gardeners will get a better result with a file because it is slower and easier to control.
Understand the bevel before you sharpen
Most garden tools have one main bevel: the angled face that leads to the cutting edge. Your job is to restore that angle, not invent a new one. Hold the blade under a lamp and tilt it until the bevel catches the light. On a used tool it may be shiny near the edge and darker farther back. That is your guide.
Bypass secateurs and loppers usually have one sharpened blade passing a thicker hook or counter-blade. Sharpen the bevelled side of the cutting blade only, then remove the tiny burr from the flat back with one or two gentle strokes. Do not put a bevel on both sides unless the tool was made that way. Anvil secateurs are slightly different: the cutting blade meets a flat anvil, so the edge still needs to be straight and even, but the anvil should remain flat and smooth rather than sharpened into a blade.
Hoes and spades do not need a knife edge. A tough, slightly rounded working edge lasts longer in gritty soil. Mower blades also need a robust edge, not a razor, because they spin at speed and meet twigs, stones and uneven ground.
How to sharpen secateurs and loppers
Secateurs and loppers are the tools most worth sharpening because the difference is immediate. Clean cuts matter for plant health, especially on living stems. The RHS has clear pruning guidance, and sharp tools make that advice easier to follow without crushing stems.
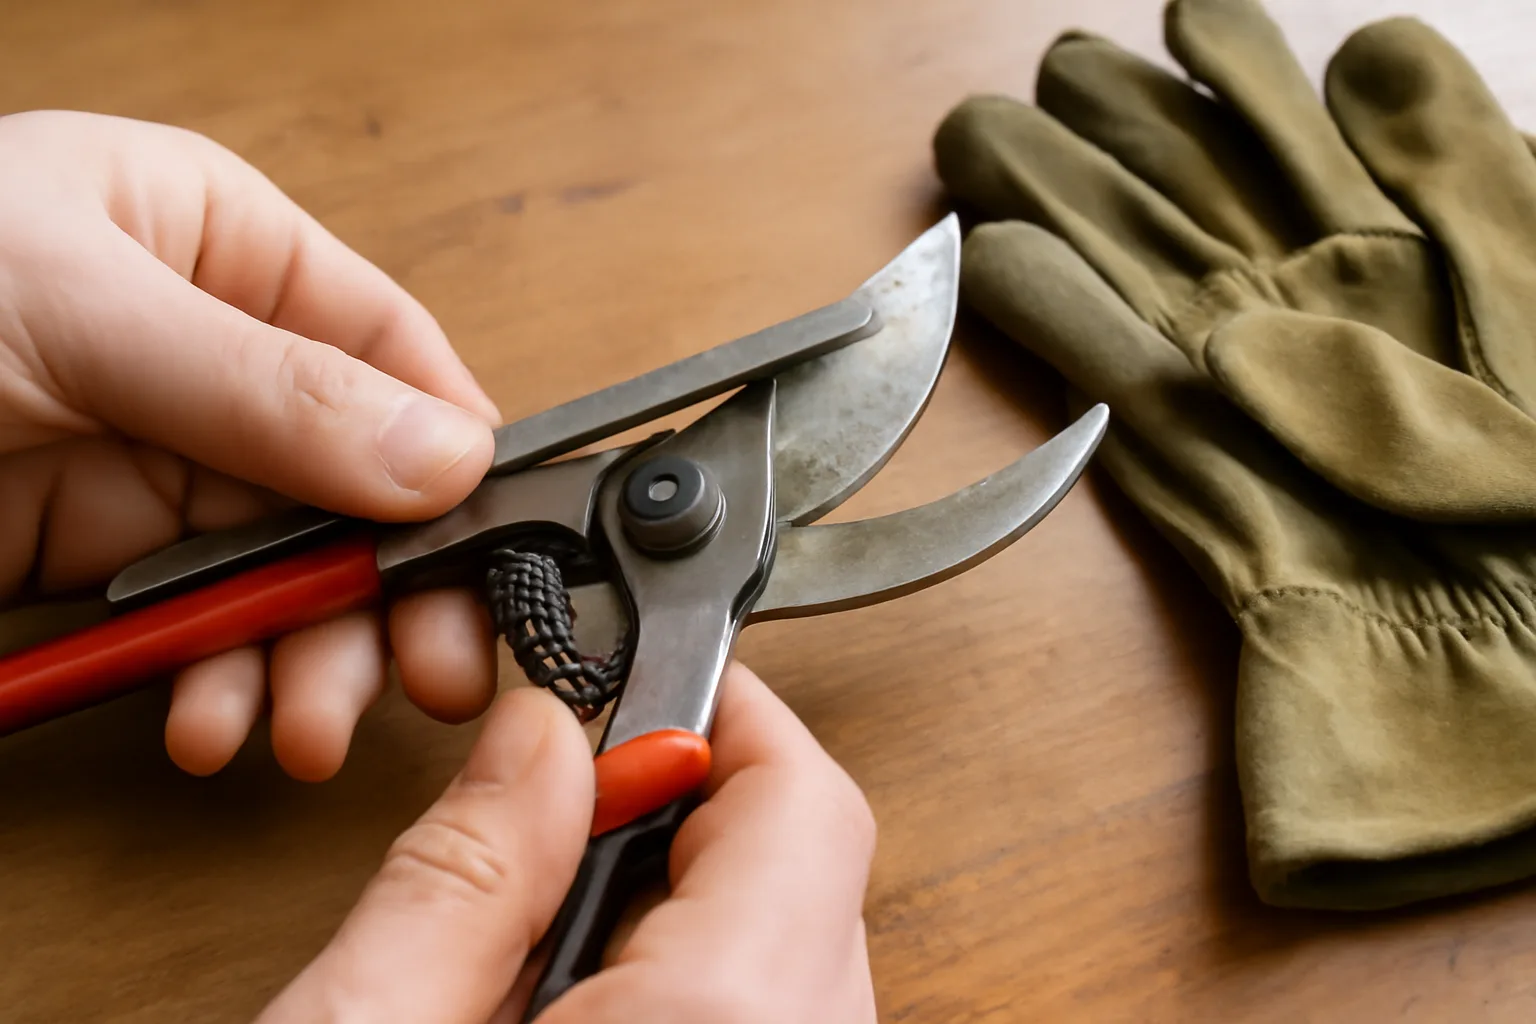
Open the secateurs fully. If the tool comes apart easily and you are confident reassembling it, undo the pivot bolt and separate the blade. If not, keep it assembled and open, then clamp it carefully so the cutting blade is stable. Wipe away sap from the pivot and along the blade before filing.
- Find the bevel on the cutting blade and match its angle, often around 20–30 degrees.
- Push the diamond sharpener or file from the heel of the blade towards the tip, following the curve.
- Use smooth strokes in one direction. Scrubbing back and forth makes it harder to keep the angle steady.
- Spend extra time on dull patches and small nicks, but do not grind the whole blade thin.
- Turn the blade over and remove the burr from the flat side with one light pass, keeping the sharpener almost flat.
- Oil the pivot, reassemble if needed, and adjust the nut so the blades pass closely without sticking.
Test on a thin twig or a scrap of paper, not on your finger. If the cut is ragged, the blade may still be dull, the pivot may be loose, or the blades may not be meeting properly. Our guide to choosing and caring for secateurs, loppers and pruning saws explains the main tool types if you are deciding whether an old pair is worth saving.
Sharpening garden shears and hedge tools
Manual edging shears and hedge shears are usually sharpened like oversized scissors, but only along the original bevel. Clean resin first, because a sticky blade can feel blunt even after sharpening. Clamp one blade at a comfortable angle and work along the bevel with a flat file or diamond sharpener, using long strokes from the pivot end towards the tip.
Try to keep the number of strokes similar on each blade so the pair stays balanced. Once the bevel looks fresh, remove the burr from the flat face with a very light pass. Oil the pivot and open and close the shears a few times. If the blades push stems aside instead of cutting them, tighten the pivot slightly or check for bent blades.
Powered hedge trimmers are more awkward. Their reciprocating teeth have many small cutting edges and little clearance for a file. Remove the battery or unplug the machine before cleaning. Resin build-up is common, so clean the teeth before assuming they are blunt. If you sharpen the teeth yourself, use a small flat file and follow the existing angle on each exposed cutting face. Do not run the machine while working on it, and do not remove guards.
If the teeth are badly chipped, the bar is bent, or the trimmer vibrates more than usual, servicing is safer than home filing. For buying, maintenance and safety considerations, see our UK hedge trimmer guide.
How to sharpen hoes, spades and edging tools
Soil-working tools need a durable edge. The aim is to reduce effort, not create something so sharp that it folds over on the first stone. A hoe benefits from a clean bevel because it cuts weed seedlings at or just below the soil surface. A spade benefits from a tidy leading edge because it enters compacted ground more easily.
Clamp the hoe head or spade blade so the edge is facing away from you. Use a mill file with a handle and push the file across the bevel. On many hoes, the bevel is on the outside or upper face, depending on the pattern; follow what is already there. For a draw hoe, sharpen the edge that is pulled towards you through the soil. For a Dutch hoe, sharpen the front cutting edge and, if designed for push-pull use, the rear edge as well.
For a spade, file the front edge from the back of the blade if that matches the existing bevel, keeping a fairly blunt angle of roughly 40–45 degrees. Do not thin the corners too much, as they take a lot of abuse. After filing, knock off the burr on the opposite side with a couple of light strokes.
Edging irons can be treated like spades, though a slightly cleaner edge helps achieve a neat lawn border. Wipe all soil-working tools with oil afterwards, especially if your shed is damp or close to the coast. A bucket of dry sand mixed with a little oil is an old-fashioned way to clean and protect spades and hoes between uses, but wipe excess oil off before putting tools back into soil.
Sharpening a lawn mower blade at home
A blunt mower blade tears grass rather than cutting it. The lawn may look pale or frayed at the tips a day or two after mowing. Sharpening the blade can improve the finish, but mower blades deserve extra caution because they are heavy, fast-moving parts.
Start by isolating the machine. Remove the battery from a cordless mower, unplug an electric mower, or disconnect the spark plug lead on a petrol mower. If you have a petrol mower, tip it only in the direction recommended in the manual to avoid oil or fuel entering places it should not. Mark the underside of the blade with chalk or tape so you know which way it goes back.
Undo the retaining bolt with the correct socket and support the blade as it loosens. If the bolt is stuck, do not brace the blade with your hand near the cutting edge; use a block of wood. Once removed, clean the blade and inspect it. A blade that is cracked, heavily bent, deeply pitted around the mounting hole or missing chunks of metal should not be sharpened and reused.
Clamp the blade and file along the existing bevel, from the centre towards the tip. Keep both ends as even as possible. A grinder is quicker, but overheating is easy; if the metal turns blue, it has become too hot. After sharpening, balance the blade. A purpose-made blade balancer is inexpensive, but a nail fixed level in a wall can give a rough indication: hang the blade from its centre hole and see if one end drops. File a little from the heavier end until it sits level.
Refit the blade the right way up and tighten the bolt to the manufacturer’s recommended torque if available. Never mow without the blade properly secured and the guards in place. If you are using newer battery kit, the maintenance routine is still much the same; the main difference is remembering to remove the battery before working. We have a broader look at battery tools in are cordless garden tools worth it?.
Pruning saws, serrations and tools best left alone
Not every cutting edge in the shed is a good candidate for home sharpening. Many modern pruning saws have impulse-hardened teeth, which are extremely hard at the tips. They stay sharp for a long time, but ordinary files skate over them. Once dull, the practical answer is usually a replacement blade.
Older non-hardened saws can be sharpened with specialist triangular files, but the tooth geometry is fiddly and easy to spoil. Unless you enjoy saw setting and filing, your time is often better spent cleaning the blade, preventing rust and replacing it when cutting becomes slow.
Serrated knives, grass hooks and some multi-tools vary widely. If the serrations are large enough to accept a tapered diamond file, sharpen each gullet gently from the bevelled side only. If the serrations are tiny or the tool has a safety-critical moving mechanism, use the manufacturer’s spare parts or a professional service.
For gardeners with very limited storage, it is tempting to keep every inherited tool just in case. In a small plot or shed, sharp and safe tools matter more than quantity. If you are rethinking a compact outdoor space, our small garden ideas for UK spaces may help you choose what earns its place.
Finishing, oiling and storing sharp tools
It is worth cleaning the wider working area too. Muddy handles, gritty paving dust and damp shed floors all undo sharpening work quickly. If the tools are part of a bigger tidy-up, our patio cleaning guide covers moss, algae and outdoor grime that often end up on blades and spades.
After sharpening, wipe away filings with a rag. Metal dust left around pivots and springs turns into gritty paste once oil is added. Use a drop of oil on moving parts and a very thin film on exposed steel. Too much oil attracts dirt, so buff off the excess.
Wooden handles deserve attention too. Sand any splinters and rub in a little boiled linseed oil, allowing it to dry fully before storage. Do not leave oily rags screwed up in a corner; they can heat as they oxidise. Lay them flat outside to dry, or dispose of them safely according to the product label.
Store cutting tools closed, locked or covered. Secateurs with a working catch are safer in a drawer. Shears can be hung with the blades together. Mower blades should be refitted or stored where they cannot fall. A tidy rack in a dry shed is not just neat; it prevents edges knocking together and keeps damp away.
Common sharpening mistakes to avoid
If sharpening shows that the tool is past saving, compare replacement types before buying. Our guide to secateurs, loppers and pruning saws explains which cutting tools suit different pruning jobs, while the UK hedge trimmer guide covers powered hedge tools where home sharpening is less forgiving.
The most common mistake is changing the angle too much. A very narrow angle may feel sharp for a few minutes, then crumble or roll over in use. A very steep angle feels strong but will not cut cleanly. Follow the original bevel unless the tool has already been badly abused.
Another mistake is sharpening both sides of a bypass blade. This can stop the blade passing closely against the hook, which leads to crushed stems. On bypass secateurs, sharpen the bevelled cutting face and only deburr the flat back.
Do not ignore adjustment. Many tools are blamed for being blunt when the pivot is loose. Secateur blades should pass cleanly without a gap. Shears should meet along their length. Loppers should not wobble under pressure. Clean, sharpen, oil, then adjust.
Lastly, do not chase perfection. Garden tools are working tools. A clean, even, burr-free edge is enough. If you find yourself removing lots of metal to erase every nick, stop and consider whether the tool has reached the end of its useful life or needs a new blade.
Frequently Asked Questions
How often should I sharpen secateurs? For regular pruning, a light touch-up every few weeks in the growing season is better than waiting until the blade is very dull. If you are cutting sappy shrubs or woody stems, clean the blade after each session and sharpen as soon as cuts start to look crushed or ragged.
Can I use a kitchen knife sharpener on garden tools? It is usually not ideal. Pull-through kitchen sharpeners are made for thin, double-bevelled knives and can put the wrong angle on secateurs, shears and mower blades. A flat file or diamond sharpener gives more control and lets you follow the tool’s existing bevel.
Should garden tools be razor sharp? Secateurs and loppers should be sharp enough to cut cleanly, but hoes, spades and mower blades need a tougher edge. A razor edge on soil tools will dull quickly, especially in stony ground. Aim for clean and even rather than shaving sharp.
Is it safe to sharpen a mower blade without removing it? It is not recommended. Removing the blade allows you to inspect it, sharpen both ends evenly and check the balance. Always isolate the mower first by removing the battery, unplugging it or disconnecting the spark plug lead, depending on the machine.
Why do my secateurs still crush stems after sharpening? The pivot may be loose, the blades may be misaligned, or the flat side may have been over-filed. Clean the pivot, oil it, tighten the nut gradually and check that the cutting blade passes close to the hook. If there is still a gap or the blade is bent, sharpening alone will not solve it.
Can rusty tools be sharpened? Light surface rust can be brushed off before sharpening. Heavy pitting near the cutting edge weakens the metal and makes a clean edge difficult to achieve. Remove loose rust, inspect the tool carefully, and avoid using anything with cracks or serious metal loss.